
Created By: Khoa Do and Turan Celik
Introduction
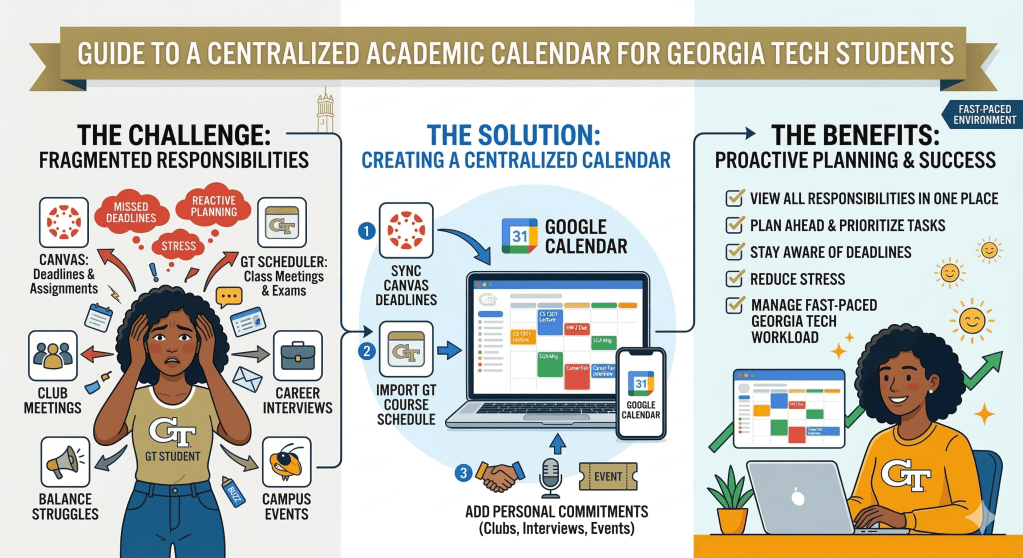
Many new Georgia Tech students struggle not because the coursework is too difficult, but because their academic information is spread across different tools and schedules. Course assignments and deadlines are posted on Canvas, class meeting times come from the GT Scheduler, and students also need to remember personal commitments such as club meetings, career interviews, and campus events. When these responsibilities exist in separate places, it becomes difficult to keep track of everything at once. Important deadlines or events can easily be overlooked, and students often find themselves reacting to reminders instead of planning their time effectively.
The challenge is not a lack of effort or motivation, but the absence of a clear and organized system for managing academic and personal responsibilities. Without a centralized view of their schedule, students may struggle to balance coursework, extracurricular activities, and other commitments throughout the semester.
This guide introduces a simple way to create a centralized academic calendar using Google Calendar. By syncing Canvas deadlines, importing course schedules from the GT Scheduler, and adding personal commitments such as club meetings, interviews, and special events, students can view all of their responsibilities in one place. Having a single calendar allows students to plan ahead, prioritize tasks, and stay aware of upcoming deadlines.
This approach is especially useful for Georgia Tech students, where the fast-paced academic environment requires strong organization and time management. By building a consistent and repeatable scheduling system, students can reduce stress, avoid missed deadlines, and manage their workload more effectively throughout the semester.
Excerpt
Georgia Tech courses move quickly, and students often manage several assignments, labs, and exams at the same time. Each semester typically includes around fifteen weeks of instruction followed by final examinations, which means deadlines can accumulate rapidly if students are not tracking them carefully. A centralized calendar allows students to see upcoming responsibilities at a glance and allocate time more effectively throughout the semester.
Instructions
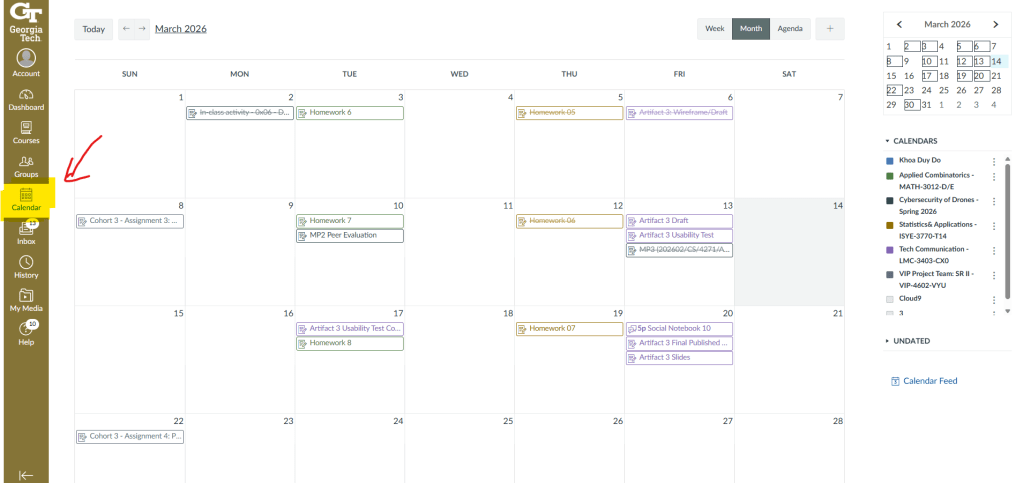
Step 1: Go to Canvas Calendar
To get started, sign in to Canvas and click on the Calendar on the left navigation bar to go to your Calendar.
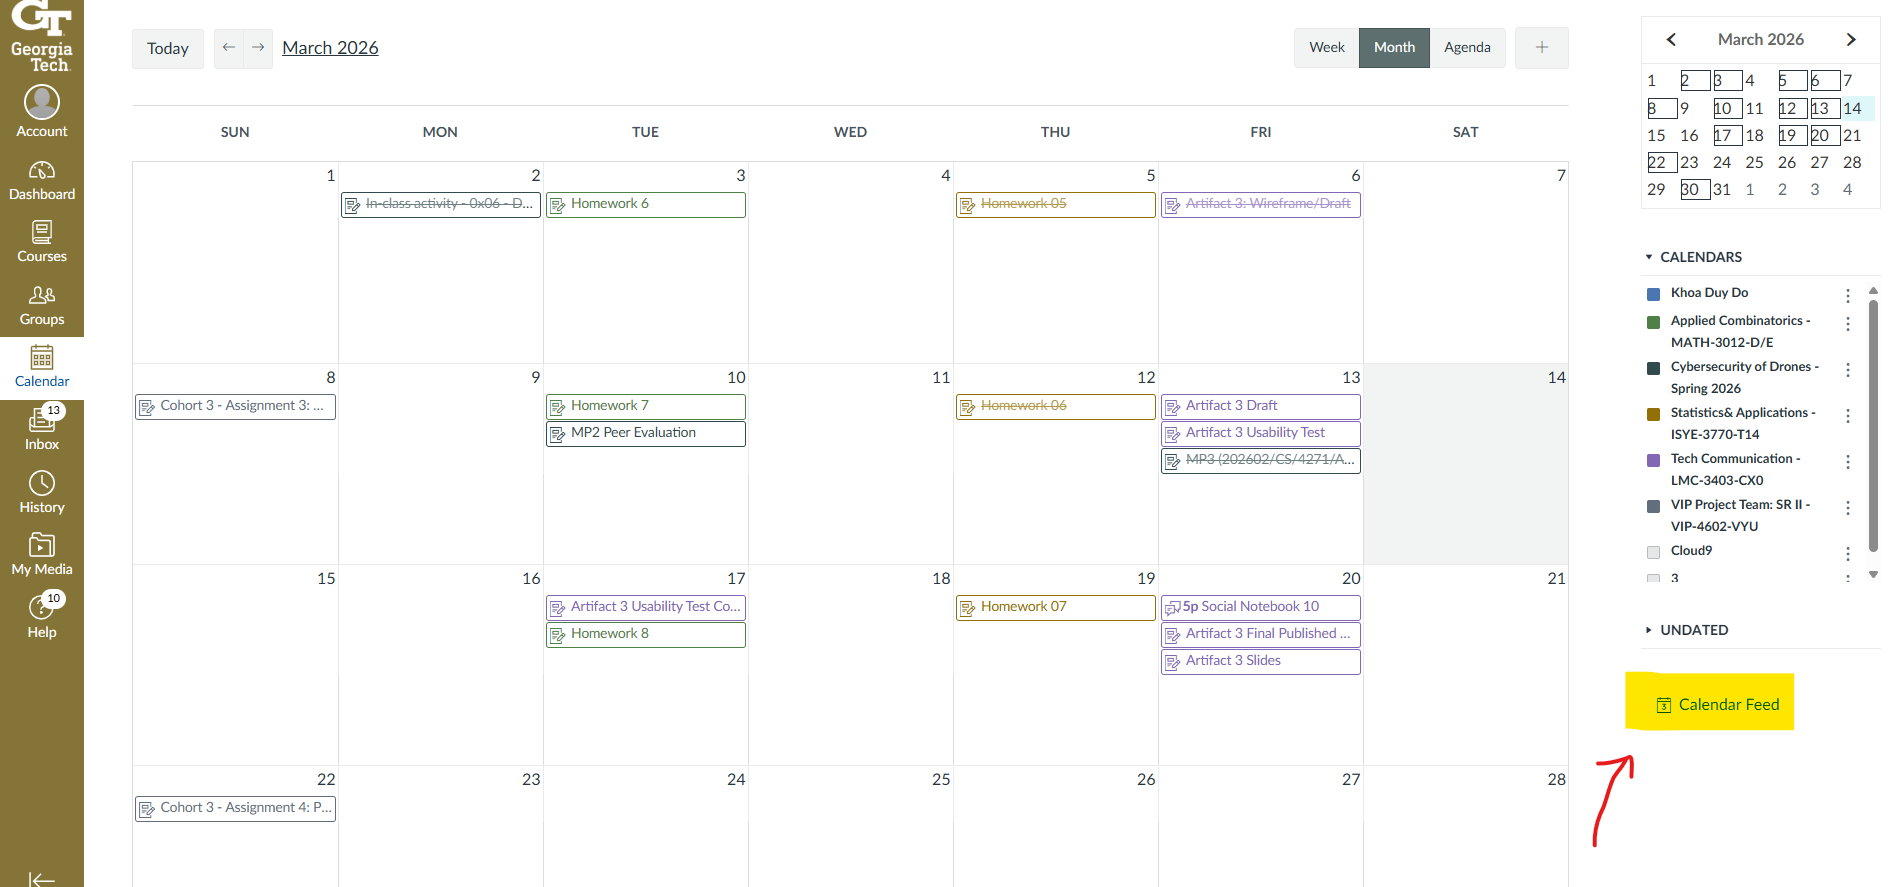
Step 2: Get the Calendar Feed URL
After navigating to the Calendar page, click on Calendar Feed on the bottom right of the page.
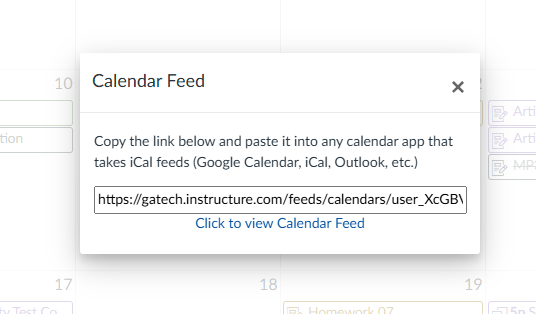
Copy the Calendar Feed URL
Step 3: Go to Google Calendar Settings Page
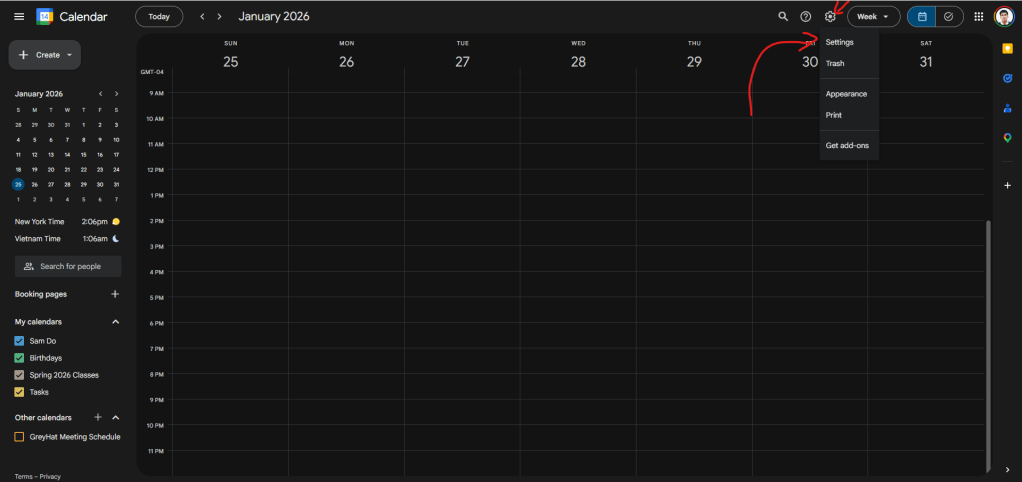
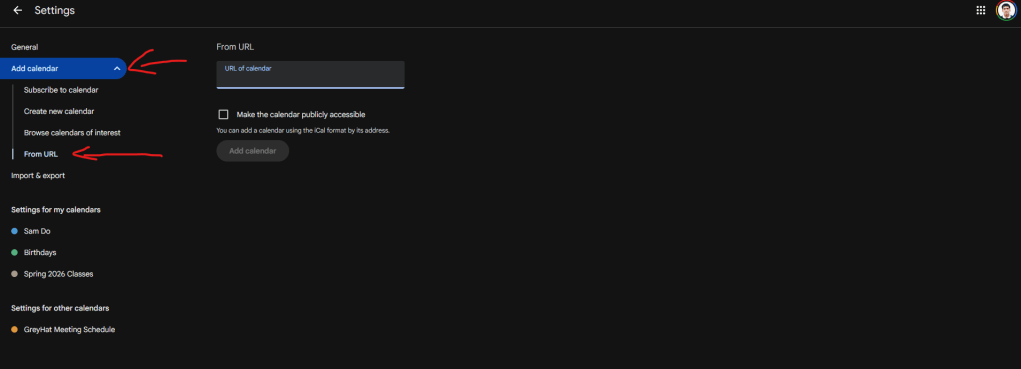
Go to Google Calendar and click on the gear button on the top right and select Settings. In the Settings page, click on Add Calendar drop down button on the left navigation panel. Then, click on From URL.
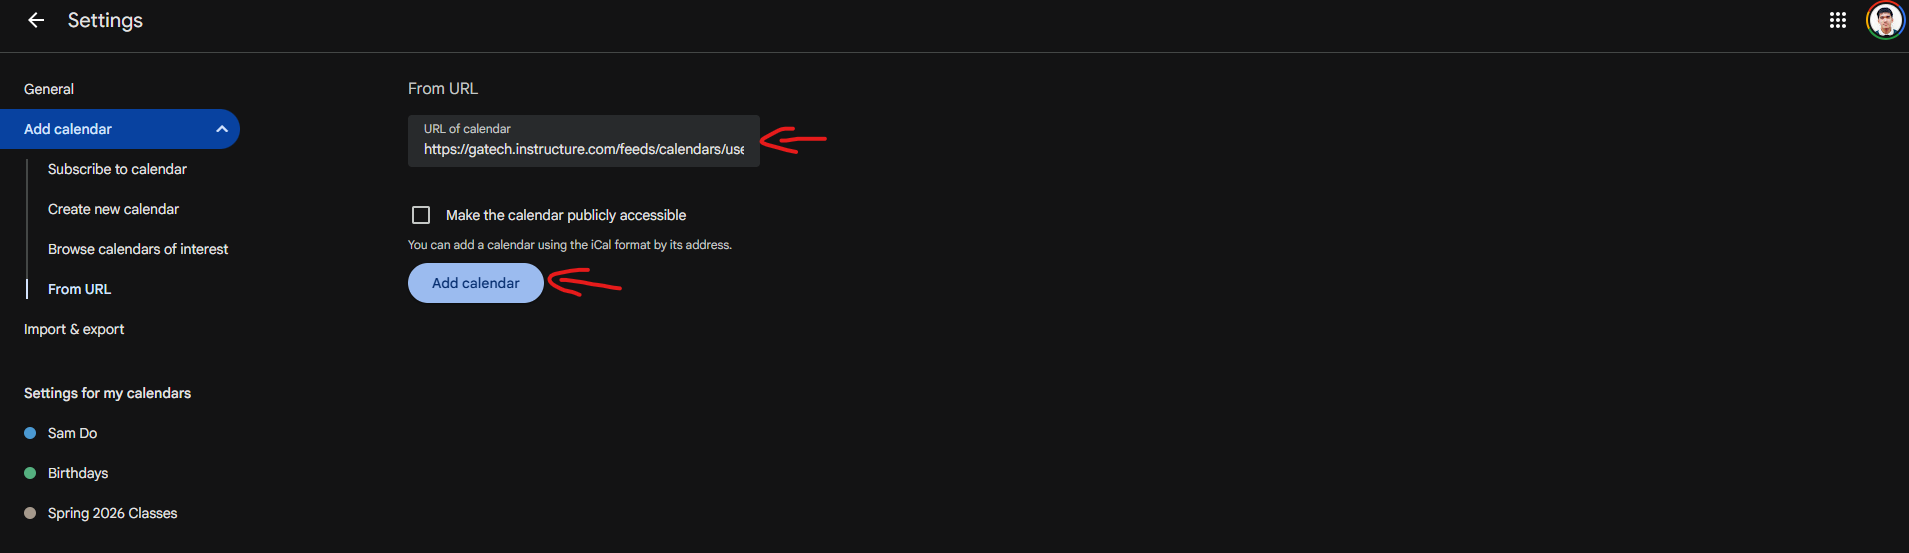
Step 4: Insert your Calendar Feed
Paste the calendar feed URL from Canvas to the “URL of calendar” box in Google Calendar and click “Add calendar”.
Pro Tip: Use a bright color for the Canvas calendar since there are assignments deadlines that have to be met, and the bright color indicates importance.
Step 5: Get GT Scheduler Calendar Feed
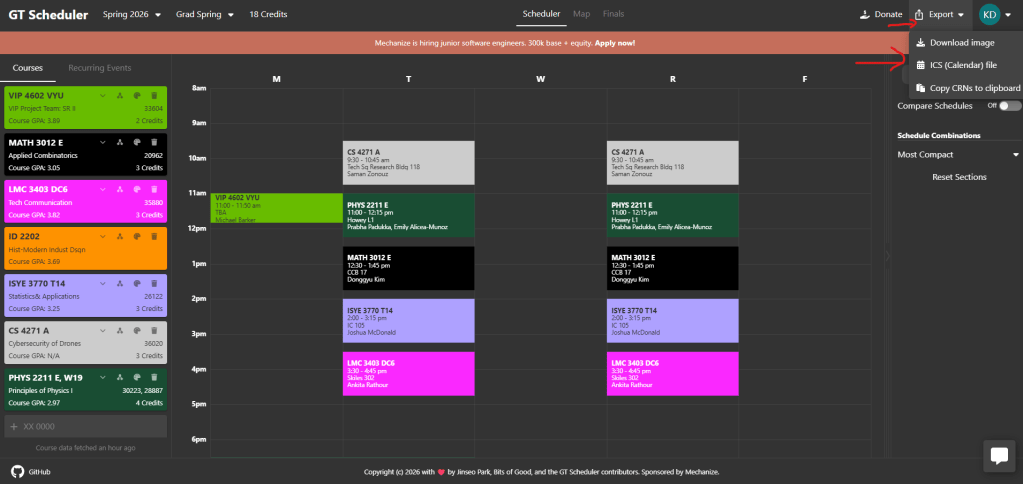
Go to GT Scheduler and click on the “Export” button in the top right.
Then, click on “ICS (Calendar) file” to download the calendar.
Step 6: Import GT Scheduler into Google Calendar
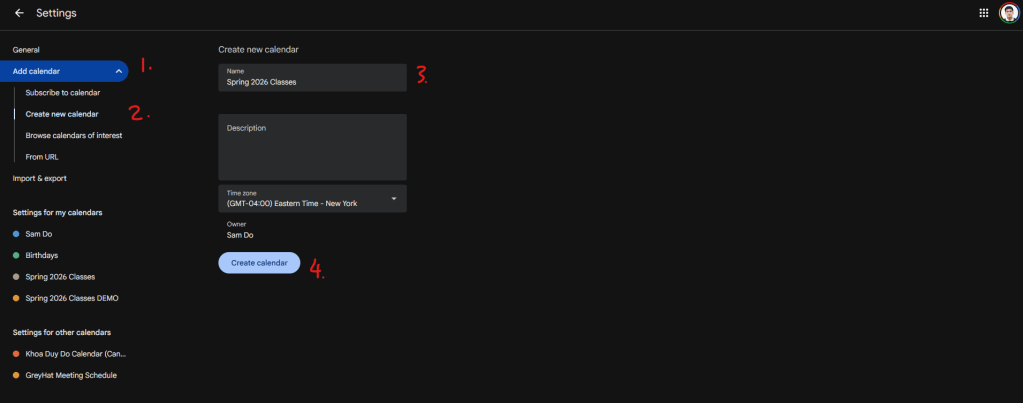
Go to the Settings page on Google Calendar and click on the “Add calendar” drop down menu.
Then, click on “Create new calendar”, provide a name for the calendar (ex: Spring 2026 Classes), and click on “Create calendar”.
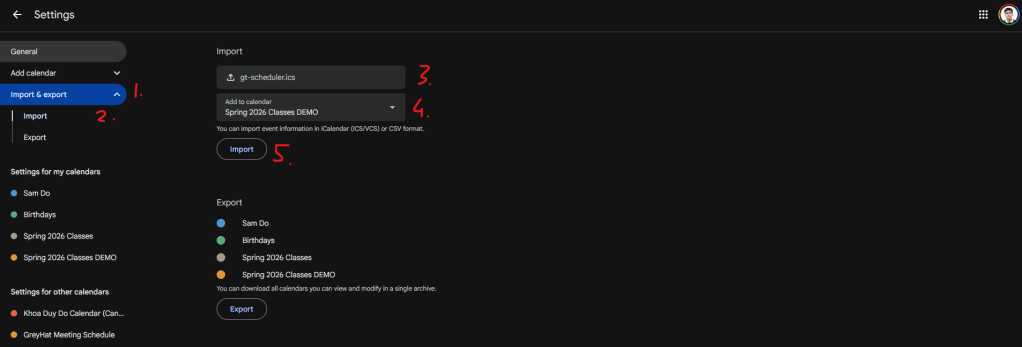
Then, click on the “Import & Export” drop down menu.
Click on “Import” and select the calendar file you downloaded. Then, changed the “Add to calendar” option to the calendar you just created. Finally, click “Import”
Pro tip: Use a dark color like gray since these are simply lecture times, not deadlines. If there is an important event or interview, use these times if needed.
Step 7: Add Events
Now, you can add your own events into the calendar like clubs, study times, work, …
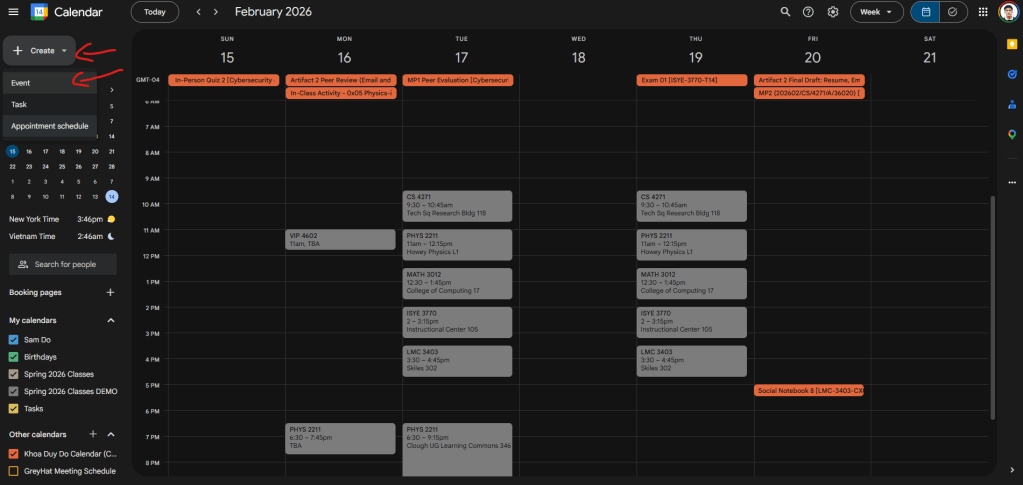
Click on the “Create” button on the top left and click “Event”.
Click on “More options” to open the full event menu.

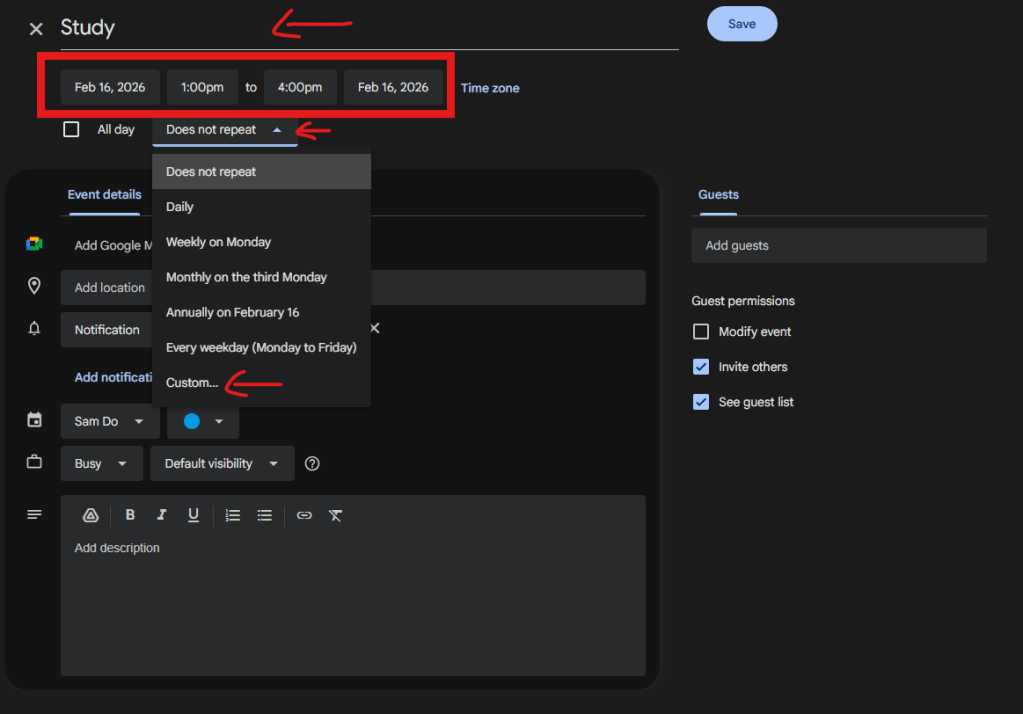
Fill out the title and select the time frame.
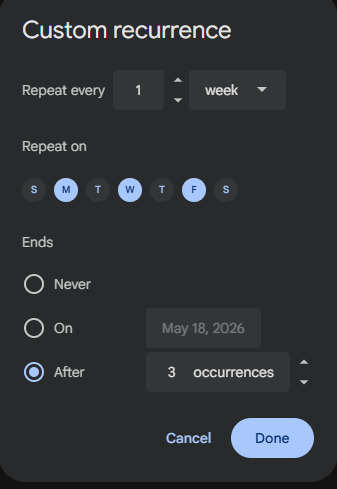
If this is a repeated event, select “Does not repeat” and click “Custom”. Select your desired recurrence and press “Done”.
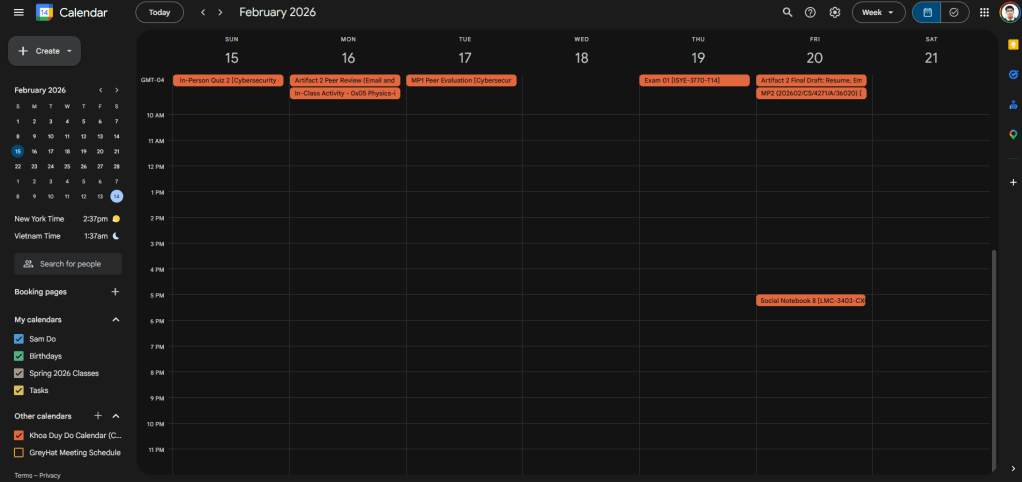
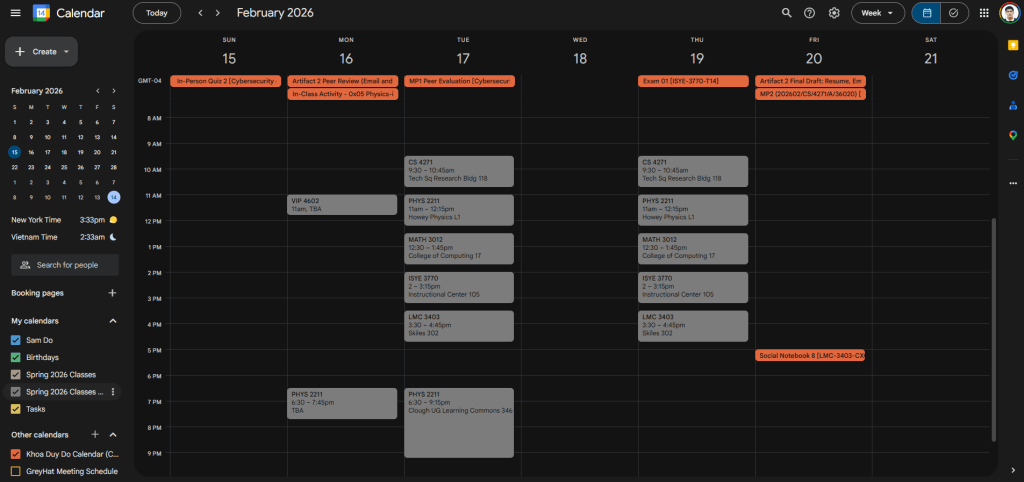
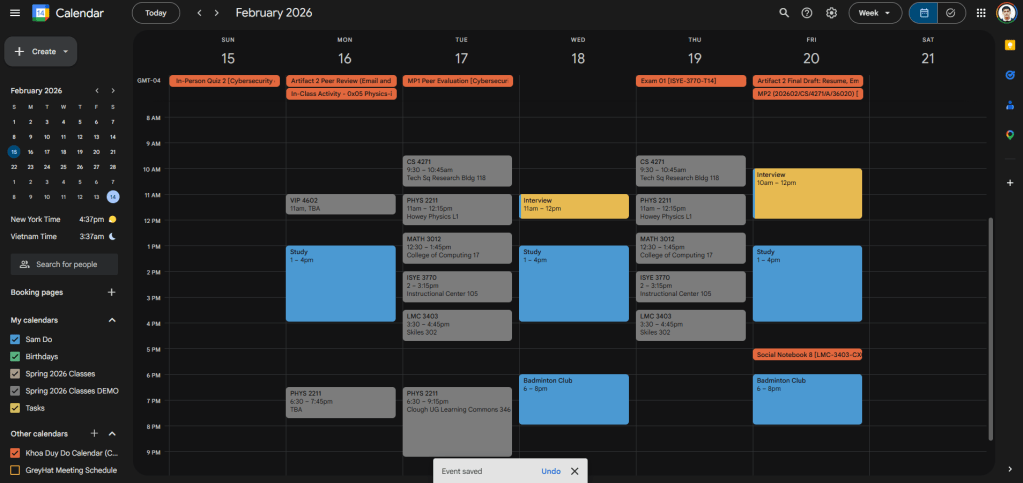
Now you can keep track with your assignments, lectures, and events all in Google Calendar!
Resources
To close out this guide, we’ve provided some additional resources for you to use while creating and managing your centralized academic calendar. Refer back to this guide whenever you need help staying organized, and check these resources for more tips and instructions:
– Google Calendar Help Center: Learn how to create events, import calendars, set reminders, and more here.
– Canvas Community Center: Instructions on subscribing to your Canvas calendar feed and syncing it with external calendars here.
– Georgia Tech Academic Calendar: Official semester dates, deadlines, and important academic milestones here.

Leave a comment