
Created By: George Corbin and Riley Corzine
Introduction
Georgia Tech is an academically rigorous school and it can oftentimes be hard to keep track of every assignment across every platform. Students use email, Canvas, Gradescope, Piazza and more for communication and submitting assignments. This can often create a feeling of being overwhelmed.
Many new students are used to using paper and handing in assignments in person so this is a major change for new students. Students often have to check multiple platforms several times a day to make sure they have not missed an announcement or assignment. Different professors use different combinations of tools, which makes the system inconsistent. Notifications can get buried in emails or platform alerts, causing students to overlook important information.
First year students are still learning how GT systems like Canvas and Gradescope work. Our GTHow guide, will show the essentials for staying organized at a rigorous school like Georgia Tech. This guide will provide a step-by-step tutorial on how to create a Notion system that integrates coursework, deadlines, clubs, and personal schedules into one clear workspace. A centralized system helps students prioritize tasks and plan their week more effectively. This structure can reduce stress and make it easier to balance academics, clubs, and social life. Over time, better organization can lead to stronger academic performance and fewer missed deadlines.
Table of Contents

Step 1: Create a Notion Workspace for Your Semester
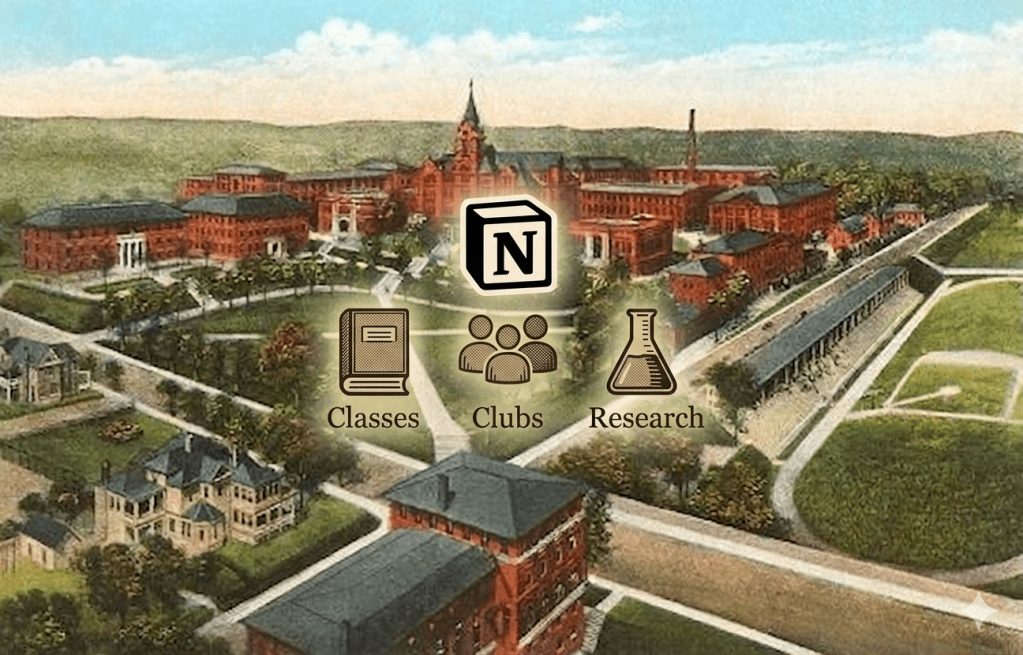
Start by creating a dedicated workspace in Notion specifically for your semester at Georgia Tech. This will become your central hub for everything related to school. A place to put classes, clubs, research and any other extracurriculars in one place.
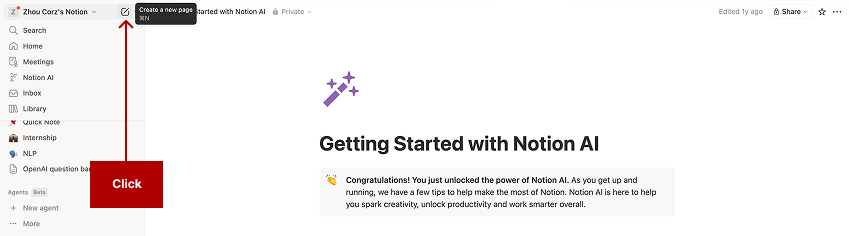
Open Notion and click the Create a new page icon in the top-left sidebar to begin building your semester hub.
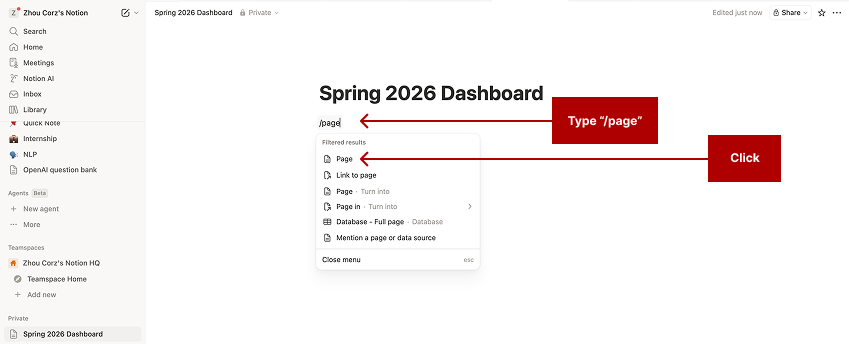
Title the page Spring 2026 Dashboard, then type /page and select Page to insert each sub-section.
Inside this page, add sections for:
- Courses
- Assignments
- Weekly Schedule
- Clubs / Organizations
- Notes
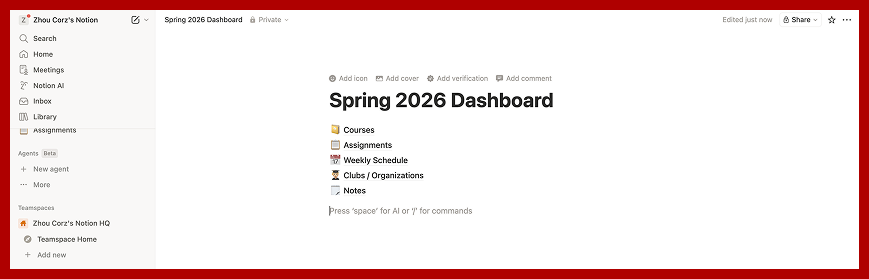
Your finished dashboard now lists all five sections — Courses, Assignments, Weekly Schedule, Clubs / Organizations, and Notes — ready to link out to dedicated pages.
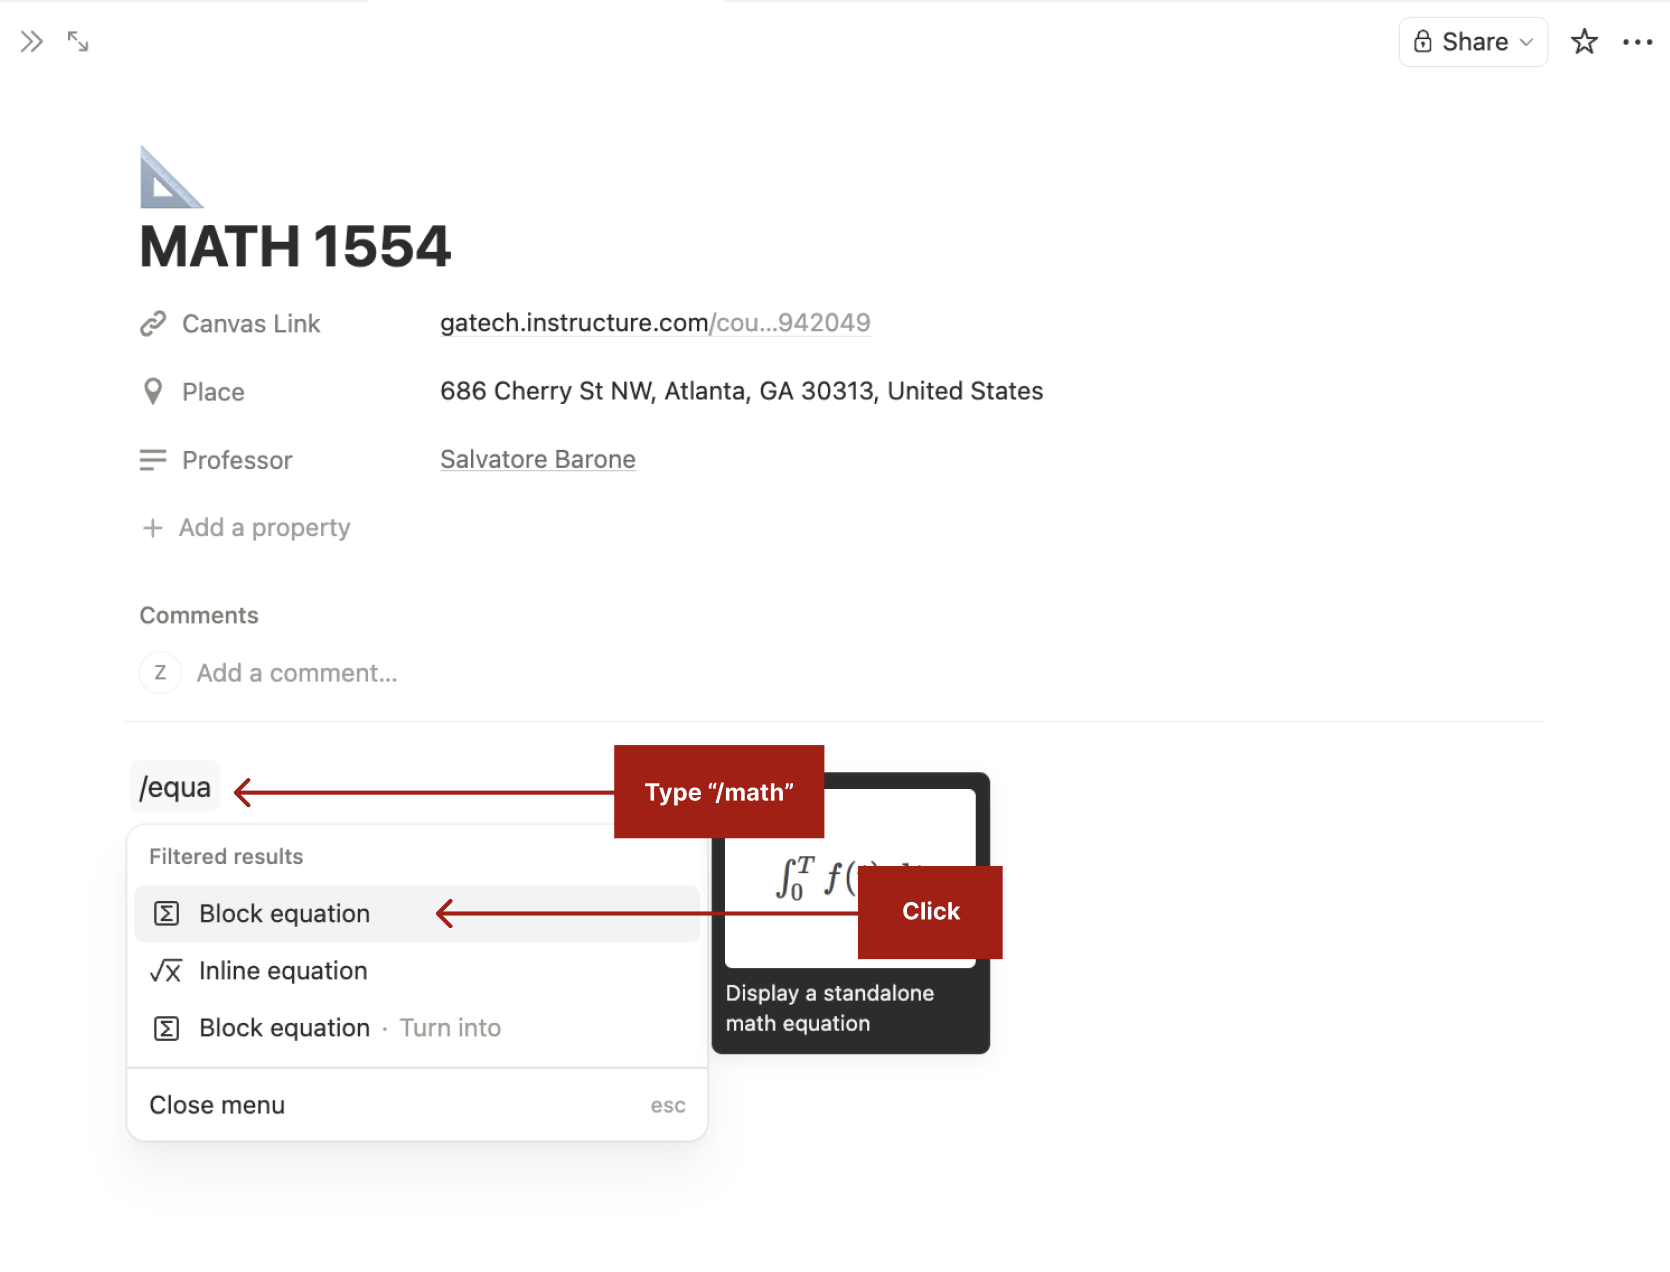
Step 2: Create a Course Database
Next, build a course database using Notion’s database feature that stores information about every class you are taking. A table where each row is a class, storing the professor, Canvas link, meeting location, and more, so every piece of course info is one click away.
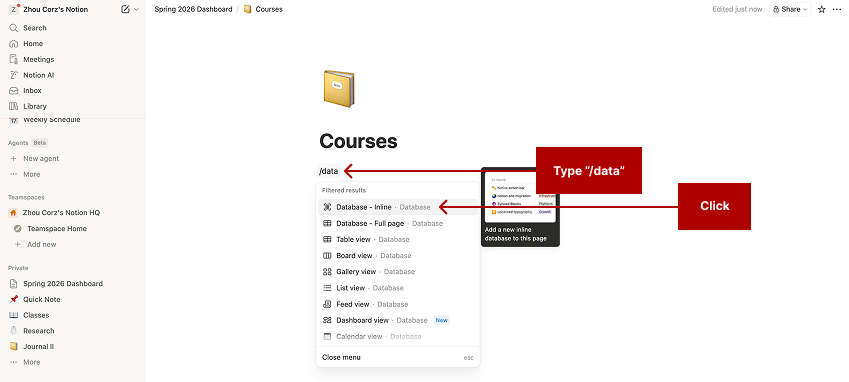
Inside your Courses page, type /data and select Database – Inline to embed a live table directly on the page.
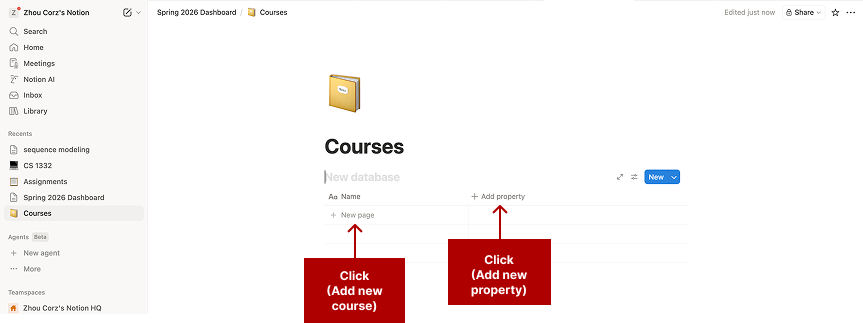
Click + New page to add each course as a row, then click + Add property to create columns for Professor, Canvas Link, Credits, and Notes.
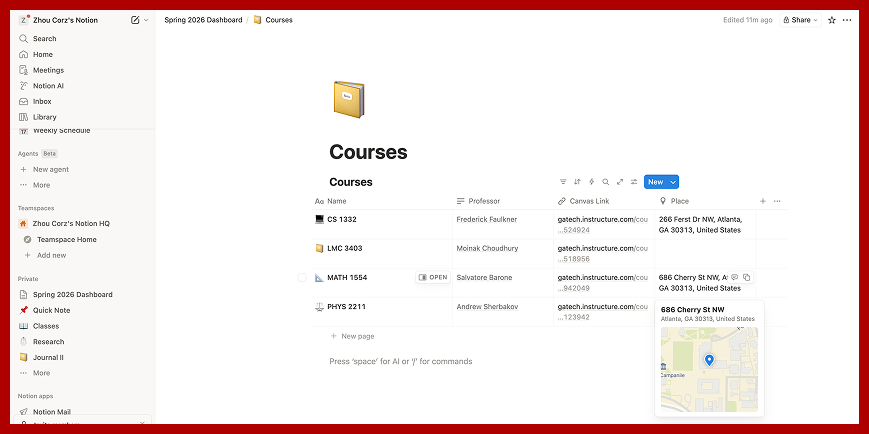
Each row represents a course. This helps students quickly access course information without searching through Canvas or email. The student can include the locations of where the class takes place so the class location can easily be found at a glance. You can also attach links directly to the Canvas course page or syllabus so they are always one click away. This step creates the foundation for organizing assignments in the next steps.
Step 3: Build an Assignment Tracker
Now create a second database called Assignments. This will track everything you need to complete across all classes and use Notion’s Relation property to connect each assignment to the correct course:
Each time you see an assignment posted on Canvas or Gradescope, immediately add it to this database. You can refer back to Step 2 on how to add entries to a database.
This prevents missed deadlines because all assignments are visible in one place rather than scattered across multiple platforms.
Linked properties allow you to connect items across different databases, ensuring that your data remains synchronized and accessible from multiple locations without manual duplication. By establishing these relationships, you create a dynamic network where a change in one record automatically updates all related views, providing a “single source of truth” for your entire workspace.
To add a linked property, click “Type property name” and then click “Relation”
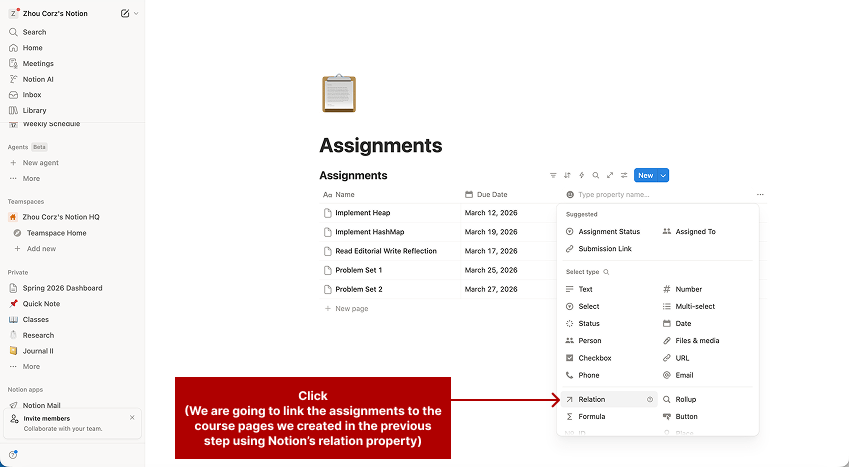
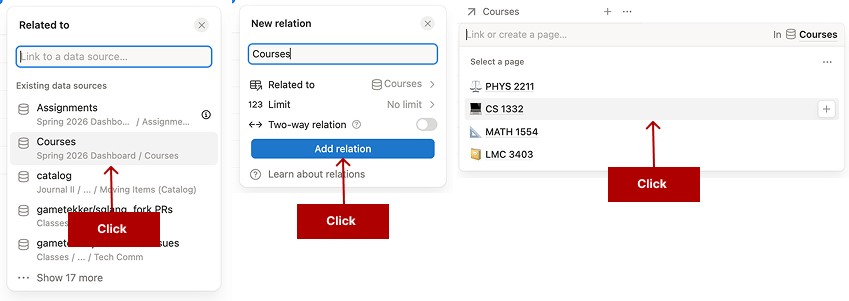
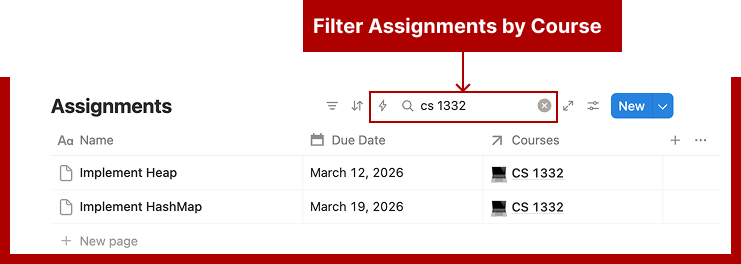
It will ask which database this is related to, you can select “Courses” and then click “Add relation” and then select the course the assignment is related to. This allows your assignments to be integrated with your course notes and for you to easily filter assignments by the relevant course.
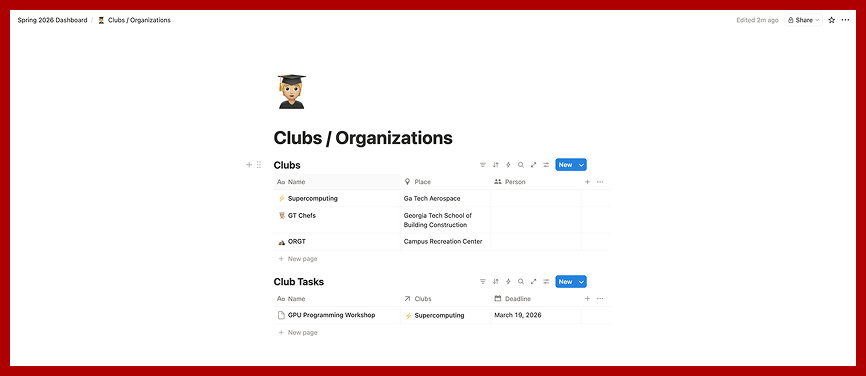
Step 4: Add a Club and Activity Tracker
Georgia Tech students often participate in clubs, research groups, and organizations. These commitments can quickly become difficult to track. Create another small database called Activities.
This ensures that club meetings, project deadlines, and networking events are visible alongside academic responsibilities.
Including activities in the same dashboard helps students balance academics with extracurricular involvement.
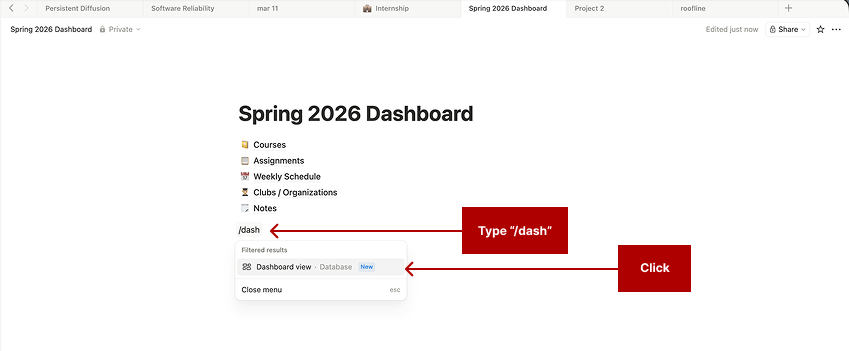
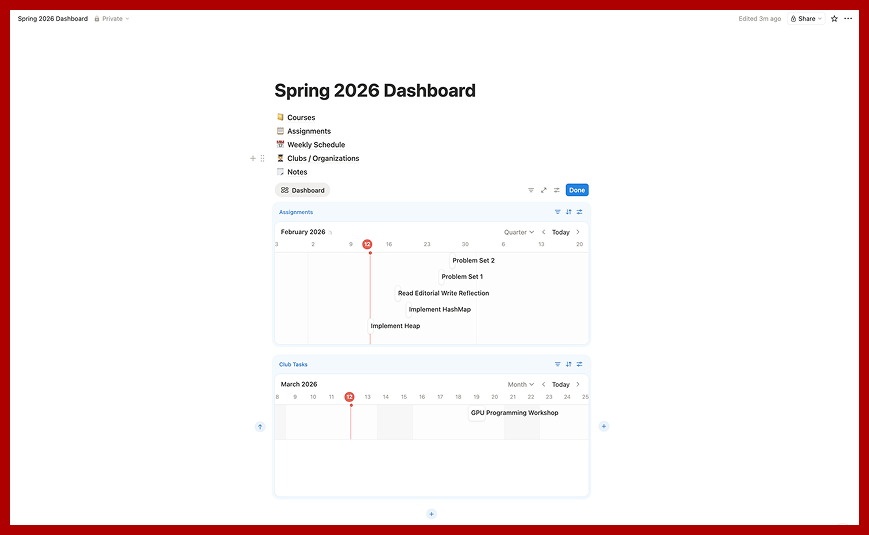
Step 5: Create a Unified Dashboard View
Instead of having to check separate pages, create a unified dashboard that has all assignments and club tasks in one place, so you can have a clear idea about all of the tasks you need to complete. In Notion, create a dashboard with a timeline view for Assignments and Club Tasks.
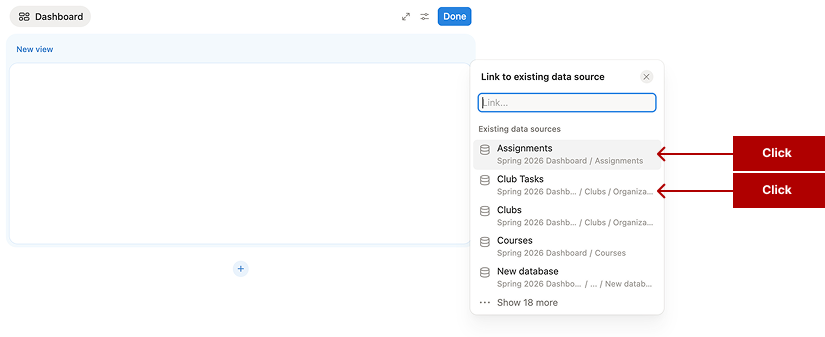
This creates a clear overview of what needs to be done each week. Many students open this page every morning to check:
- What assignments and extracurricular activities are due today
- What work should be started early
- Which tasks require the most time this week
This makes your workflow proactive instead of reactive.
Step 6: Learn how to use LaTeX in Notion
It is very important to learn LaTeX formatting because it is a survival skill at Georgia Tech.
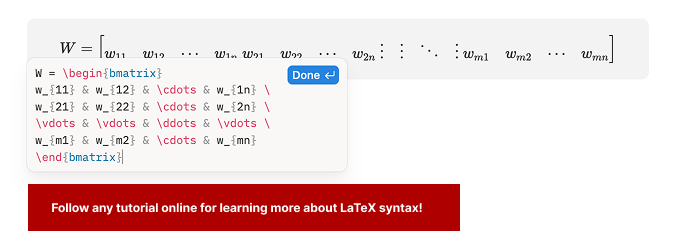
Many departments at Tech—especially CS, Math, and Aerospace Engineering—actually require assignments to be submitted in LaTeX, not handwritten. It is the industry and academic standard for technical publishing.
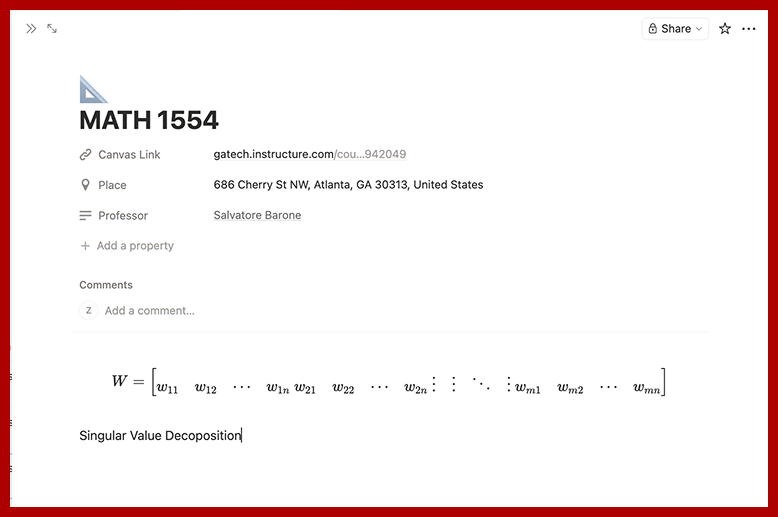
For some classes, like CS 2050, Handwritten work is often given a ZERO! Instead, they expect a pdf with LaTeX equations!
You can easily export your Notion page for Canvas or GradeScope:
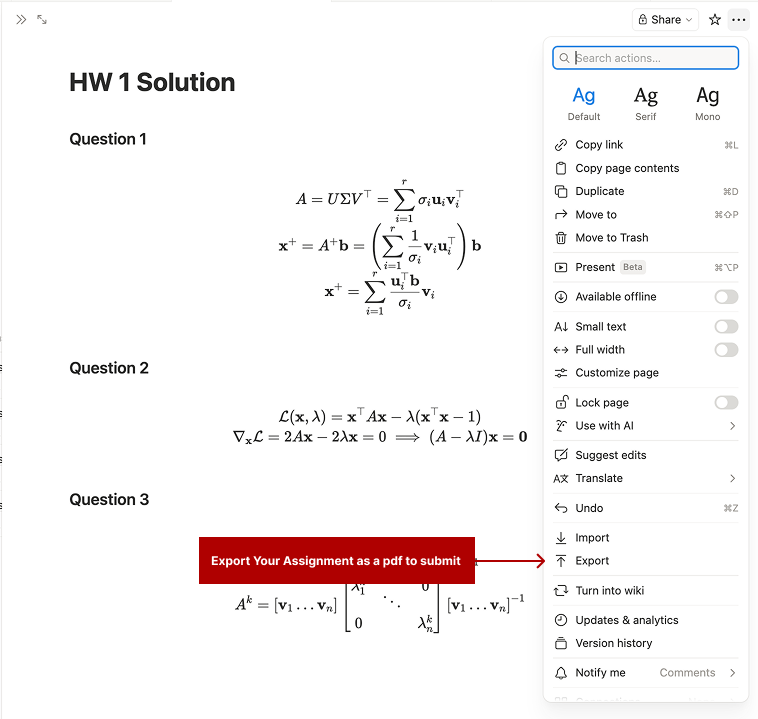
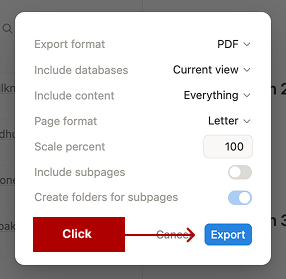
assignments with formatted equations (Created by authors).
Step 7: Share Course Notes with Friends
One of the main reasons to use Notion is to share notes with your friends. Sharing any page in Notion, is simple.
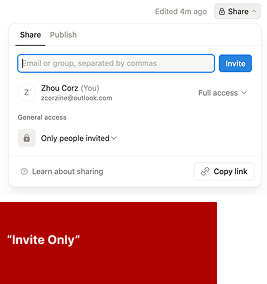
To share a Notion page, simply click the “Share” button on the upper right hand corner. This will give you several options for sharing the current page and its subpages.
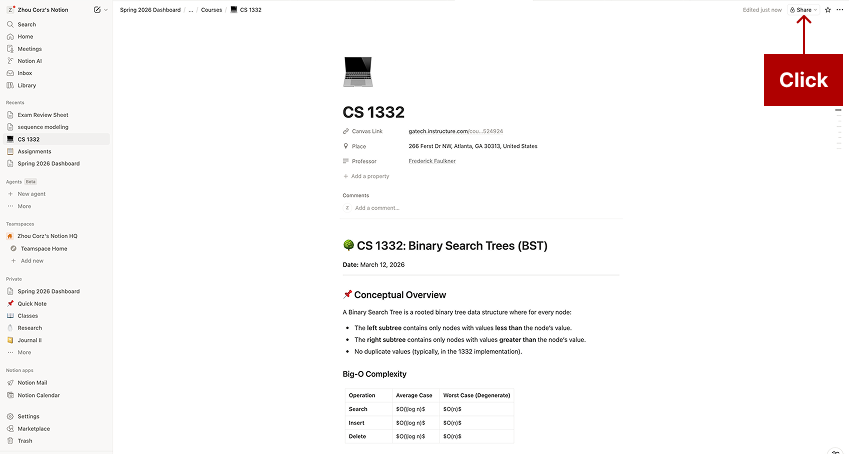
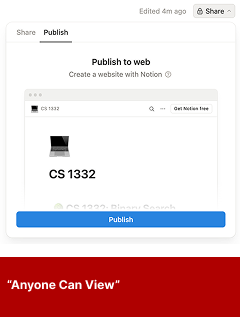
Depending on your needs you can share it privately or publicly.
- Private / “Invite Only”: ideal for small group projects. Many times the instructor wants to keep course projects private, this is the ideal choice in these circumstances.
- Public / “Anyone Can View”: ideal for large projects, and where course information is publicly available.
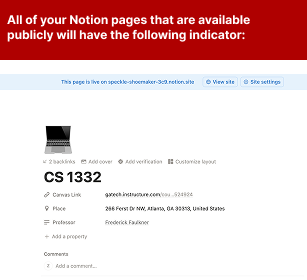
allowing specific users to view or edit a page
(Created by authors).
Obsidian: a Privacy First Alternative
If you prefer to keep your notes stored locally on your own device rather than in the cloud, Obsidian is an excellent alternative to Notion. Obsidian stores everything as plain markdown files on your computer — nothing is uploaded to external servers by default. It supports linking pages together, tagging, and even LaTeX rendering, making it a powerful option for students in CS, Math, or any technical field who want full control over their data.
Summary of External Sources & Further Reading
- Overleaf — Learn LaTeX in 30 Minutes
- Notion — Getting Started Guide
- Georgia Tech Map – Georgia Tech Map
- Obsidian — Obsidian Official Site
- GitHub — Notion GitHub Guide

Leave a comment