

By Maxwell Smith, Erica Mendez, and Alvin Le
Introduction
Your first semester on campus can be a stressful, exciting, and confusing time in your life, one that can only be made harder by the all too common freshman flu. Your first time getting sick can be especially worrying when you don’t know where to look or who to talk to about getting help.
Georgia Tech has a healthcare center on campus, but for those unfamiliar with it, getting treatment can be puzzling. To help new students in their time of need, we aim to explain the process of finding the department you need to see, making an appointment, and finding your way around the center.
We want new students to know what healthcare Stamps offers, and how to go about obtaining it. Using our GT How Page, we hope incoming students will have one less thing to worry about when they get that ever-so-common first sign of sniffles.
Table of Contents
Step One: Understanding the Patient Portal
Step Two: Finding the Right Department
Step Three: Making an Appointment
Step Four: Leading Up to the Appointment
Step Five: On the Day Of
Step Six: Checking Out/ Pharmacy Pick Up
Step Seven: Follow Ups
Step One: Understanding the Patient Portal
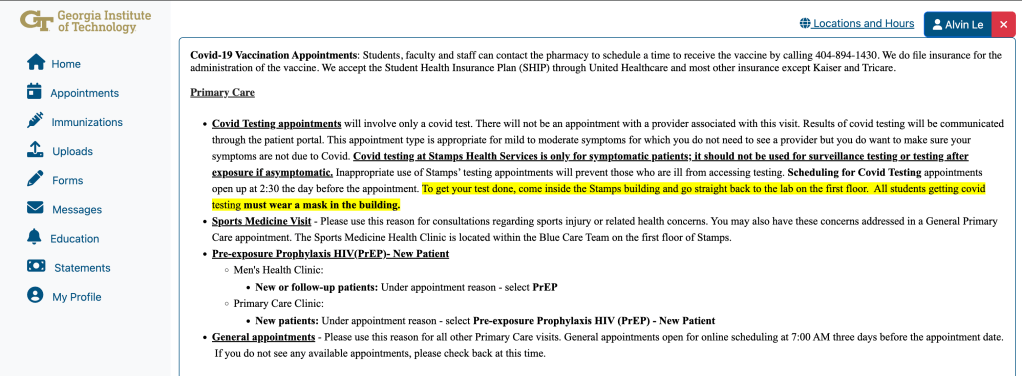
The Stamps Patient Portal.
To begin, you should navigate to the Patient Portal. After logging in with your Georgia Tech credentials, you should see a page similar to the image above. The most important content you should focus on is the navigation bar to the left of the page. This tutorial will briefly cover the purpose and function of each of these pages, but for making an appointment, the “Appointments” page will be most useful.
The “Home” page, that you are likely viewing, will list any appointments you may currently have scheduled.
Next, the “Appointments” page, as discussed above, will allow you to create an appointment. This process will be explained in further detail in the next couple of steps.
The “Immunizations” page lists your immunization records and your overall immunization status.
“Uploads” allows you to upload documents, mostly related to immunization records. This should be done when first coming to Georgia Tech, but if you see that some of your immunization records are outdated or missing, you can upload the relevant documents on this page.
The “Forms” page will list health forms that should be completed by students. For example, you are required to fill out a number of forms before every appointment at Stamps Health. Make sure to check this page and fill out forms before upcoming appointments.
“Messages” lists communications from your healthcare providers. If you get labs done at Stamps, you will likely receive a message on this page confirming the results.
The “Education” page will list education documents that your provider may want you to read. They will likely mention such documents during an appointment, but you should check back after a visit just in case you missed anything.
“Statements” lists all of your Stamps Health bills. This could be related to labs or prescriptions.
Finally, the last page, “My Profile”, shows basic personal information that Stamps has on file. It’s probably good practice to make sure this information is up to date before moving on to the next step.
Step Two: Finding The Right Department
Now that you have a good understanding of the Patient Portal, let’s dive into how you should find the right department for your healthcare needs. Start by navigating to the Stamps Health website and scroll down until you see the heading titled “Get Care”. Here you should see a number of title cards, each with its own associated “Learn More” button. If you don’t know anything about the services that Stamps has to offer, it’s a good idea to click on each “Learn More” to get details.
If you don’t want to read about each service, most general health concerns will fall under “Primary Care” so start there and see if that department is right for treating your current ailment. Once you’ve read a little about each department and found the one where you intend to make an appointment, you can move on to the next step.
Step Three: Making an Appointment
With a strong understanding of the department you’ll be visiting, you’re ready to make an appointment. To start, head over to the “Appointments” page in the Patient Portal. Begin by listing your symptoms or your reason for the appointment in the text box under the heading “Reason for Visit”. After clicking “Submit”, you will be shown three drop down menus which you must fill out in order. First, select the appropriate clinic (department) that you determined in Step Three.
Once you have selected your clinic, you will be able to select your “Reason”. Pick the choice that best fits your concern. It is okay if there isn’t a perfect match. Finally, you’ll be able to select your provider. If you’ve never been to Stamps before, you should stick with the default “All Providers” option. That being said, feel free to select a specific provider if you’d like. Once all three boxes have been filled out to your liking, click “Submit”.
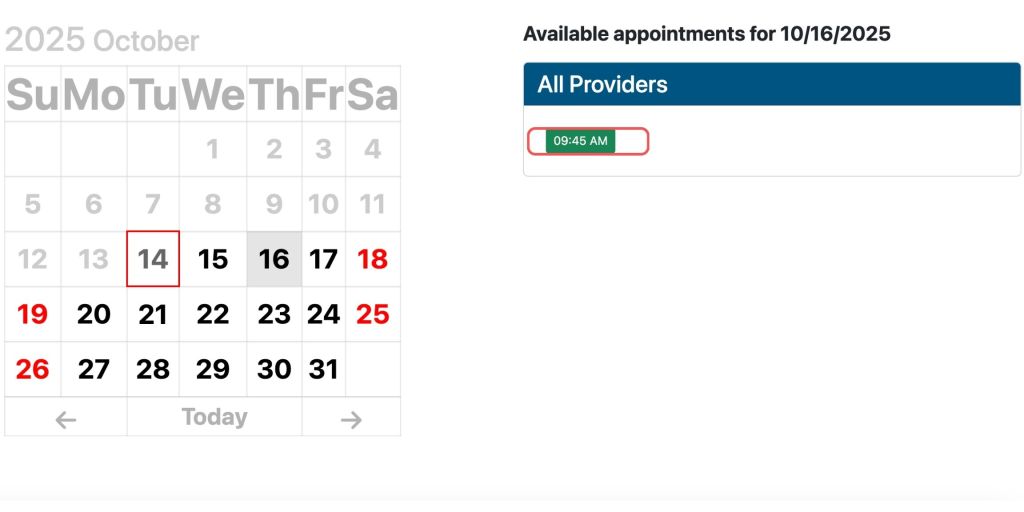
You will now see a calendar. Notice that some dates are red. These are dates where Stamps Health is closed. You should also see a red box around today’s date on the calendar. To select a day, simply click that date on the calendar. All available appointments for the selected day should appear as times on the right. It’s important to note that appointments are released three days in advance at 7 am EST.
If you don’t see any available appointments over the next three days, either try scheduling again tomorrow morning or call in at (404) 894-1420 and ask if there are any available appointments not listed on the website (this happens often). Otherwise, if you see a time that works for your schedule, click on it, and you will be notified that the appointment has been saved. Now you have an appointment, but you’re not quite done yet.

Step Four: Leading Up To the Appointment
Before you head to your appointment, there are a couple of things you should do to prepare. First and foremost, there will be forms that you must fill out prior to your appointment. These forms can be found on the “Forms” page of the Patient Portal. Click on each form under the heading “Forms for your appointment on…” and fill out the necessary information. Once the forms are complete, you’re ready for your appointment.
Step Five: On the Day Of
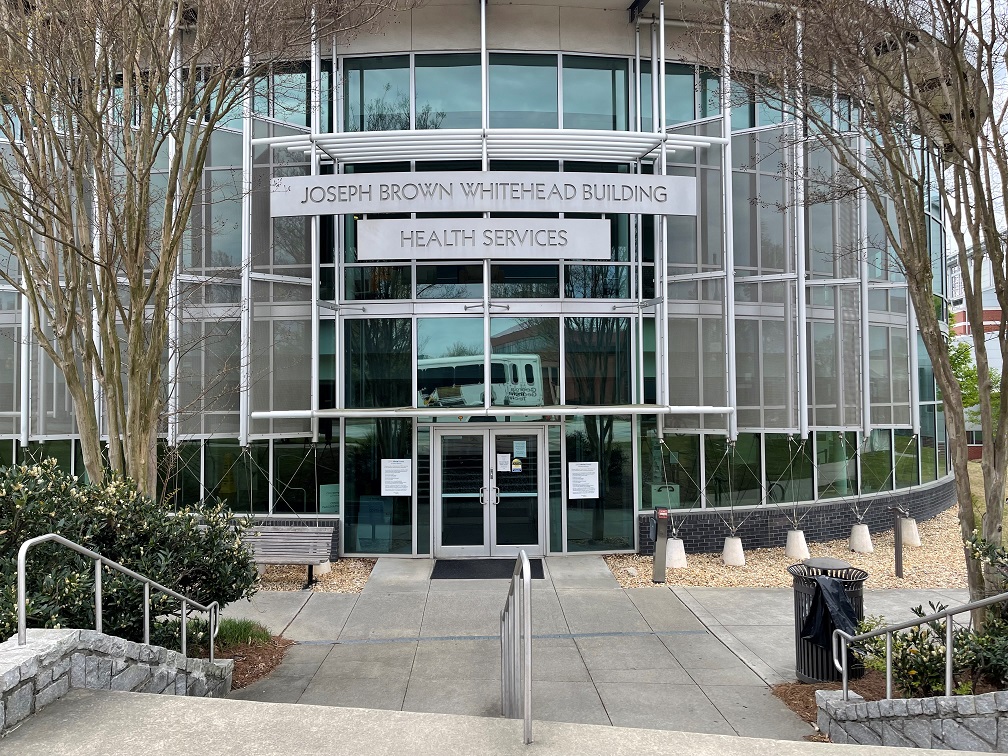
On the day of your appointment, it is very important that you plan ahead and arrive early. If you are more than five minutes late to your appointment, it will automatically be canceled. With that in mind, it is recommended that you try to arrive at Stamps 10-15 minutes before the time listed on your appointment.
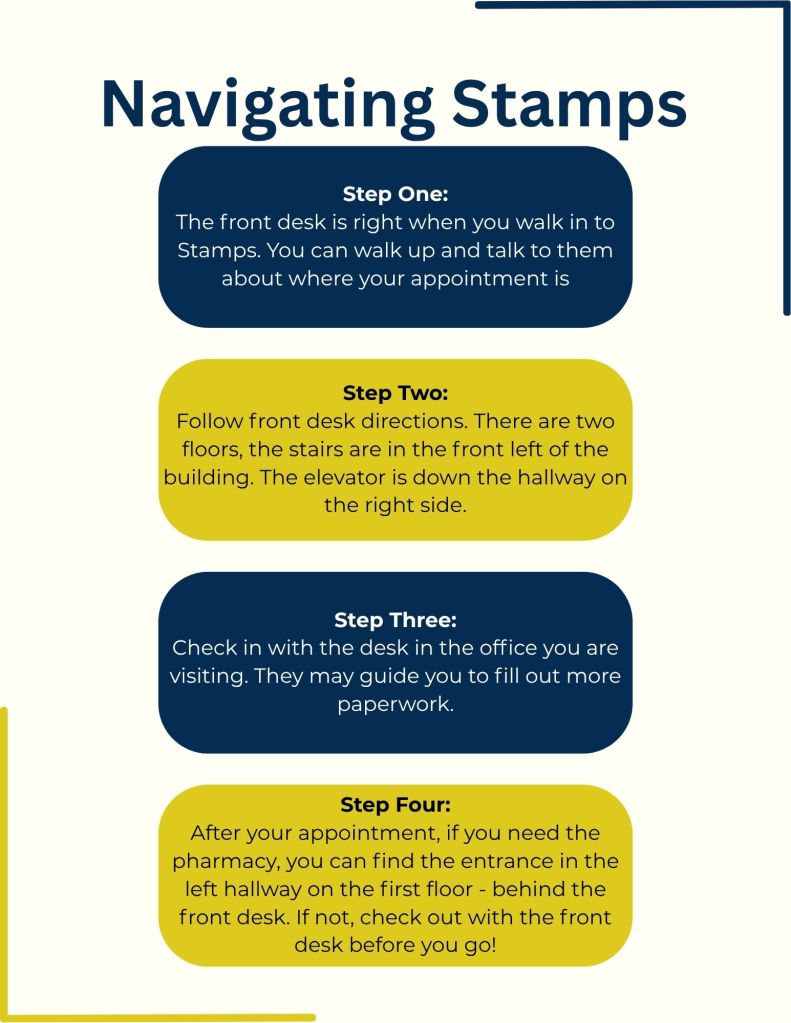
Once you get to Stamps, navigating the building can be difficult. There are different care teams organized by color. Depending on your provider, you will be instructed by someone working at the front desk to either visit the Blue, Gold, or Silver Team. To find the correct team, follow the signs and the instructions given to you by the person working at the front desk.
Once at the office, talk to the nurse in the waiting area and let them know you are there to check in. Alternatively, you can check in on the homepage of the Patient Portal beginning five minutes before your scheduled appointment time. Once checked in, take a seat and wait for your name to be called.
Step Six: Checking Out/Pharmacy Pick Up
Once your appointment is over, don’t leave just yet.
If you’re instructed to get labs done, make sure you head to the Stamps Health Services Laboratory at the very end of the hall on the left side of the first floor. Here, you will again have to check in and will then be instructed by a nurse on how to prepare for your specific testing.
If your provider wrote you a prescription, make sure to pick it up from the pharmacy located on the first floor, right behind the front desk. The pharmacy will ask for your name and GTID, so it’s good practice to have your BuzzCard on hand before you get to the front of the line.
Finally, if you completed any necessary labs and picked up prescriptions, you’re now ready to check out. Checking out can be done at the front desk. You will be asked to swipe your buzzcard and then told if you have to make any payments (usually for labs or prescriptions). You can then choose to pay with Buzz Funds or a credit card. Once you’re all paid up, you’ll be given a receipt and can now be on your way.
Step Seven: Follow Ups
Your appointment is over, and with the help of this guide, hopefully it went smoothly, but you’re still not done. Sometimes a provider will want to follow up to schedule a new appointment or send you information regarding lab results.
If your provider chooses to send you a message, you will be notified via your GT email. All messages can be viewed on the “Messages” page in the Patient Portal. Be sure to check this page if you’re expecting some sort of follow up.
Also, be aware that you can see past receipts on the “Statements” page in case you’re interested.
Conclusion Statement
Now that you’ve completed this guide, you should be ready for your first Stamps visit. Hopefully you won’t need it, but if you ever fall ill, we hope this guide provides some peace of mind in what can be a stressful time. If you found this article helpful, share it with any peers who might need assistance navigating Stamps Health Services. Thank you for reading, and here’s to your continued health!

Leave a comment